> ## Documentation Index
> Fetch the complete documentation index at: https://docs.openhome.com/llms.txt
> Use this file to discover all available pages before exploring further.
# Quickstart
> Welcome to the OpenHome Dashboard! This guide will walk you through the essential steps to get started with your OpenHome experience.
## Accessing the OpenHome Dashboard
### Login
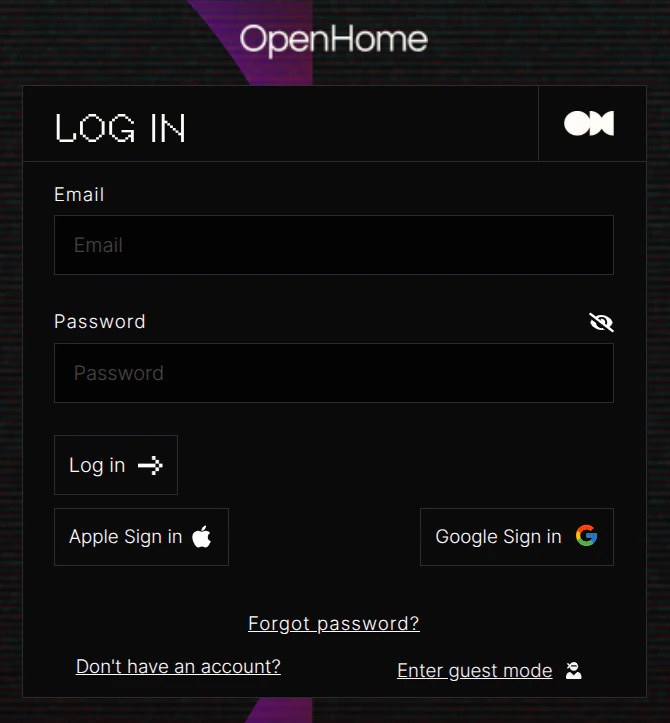
* Go to the OpenHome Dashboard.
* Enter your Email and Password.
* Click `Log in` to access your account.
* Alternatively, you can sign in using Google or Apple by clicking `Sign in with Google` or `Sign in with Apple`.
 ### New User Registration
* If you're new to OpenHome, click `Don't have any account?` to open the signup form, where you can create a new account.
* You can also sign up using Google or Apple by clicking `Sign up with Google` or `Sign up with Apple`.
### New User Registration
* If you're new to OpenHome, click `Don't have any account?` to open the signup form, where you can create a new account.
* You can also sign up using Google or Apple by clicking `Sign up with Google` or `Sign up with Apple`.
 ## Navigating the Home Page
### Home Dashboard Overview
* **Abilities:** Access default Abilities provided by OpenHome.
* **Agents:** View and manage pre-installed agents.
* **Marketplace:** Browse additional agents and Abilities.
### Using the Dashboard
#### Start Conversation
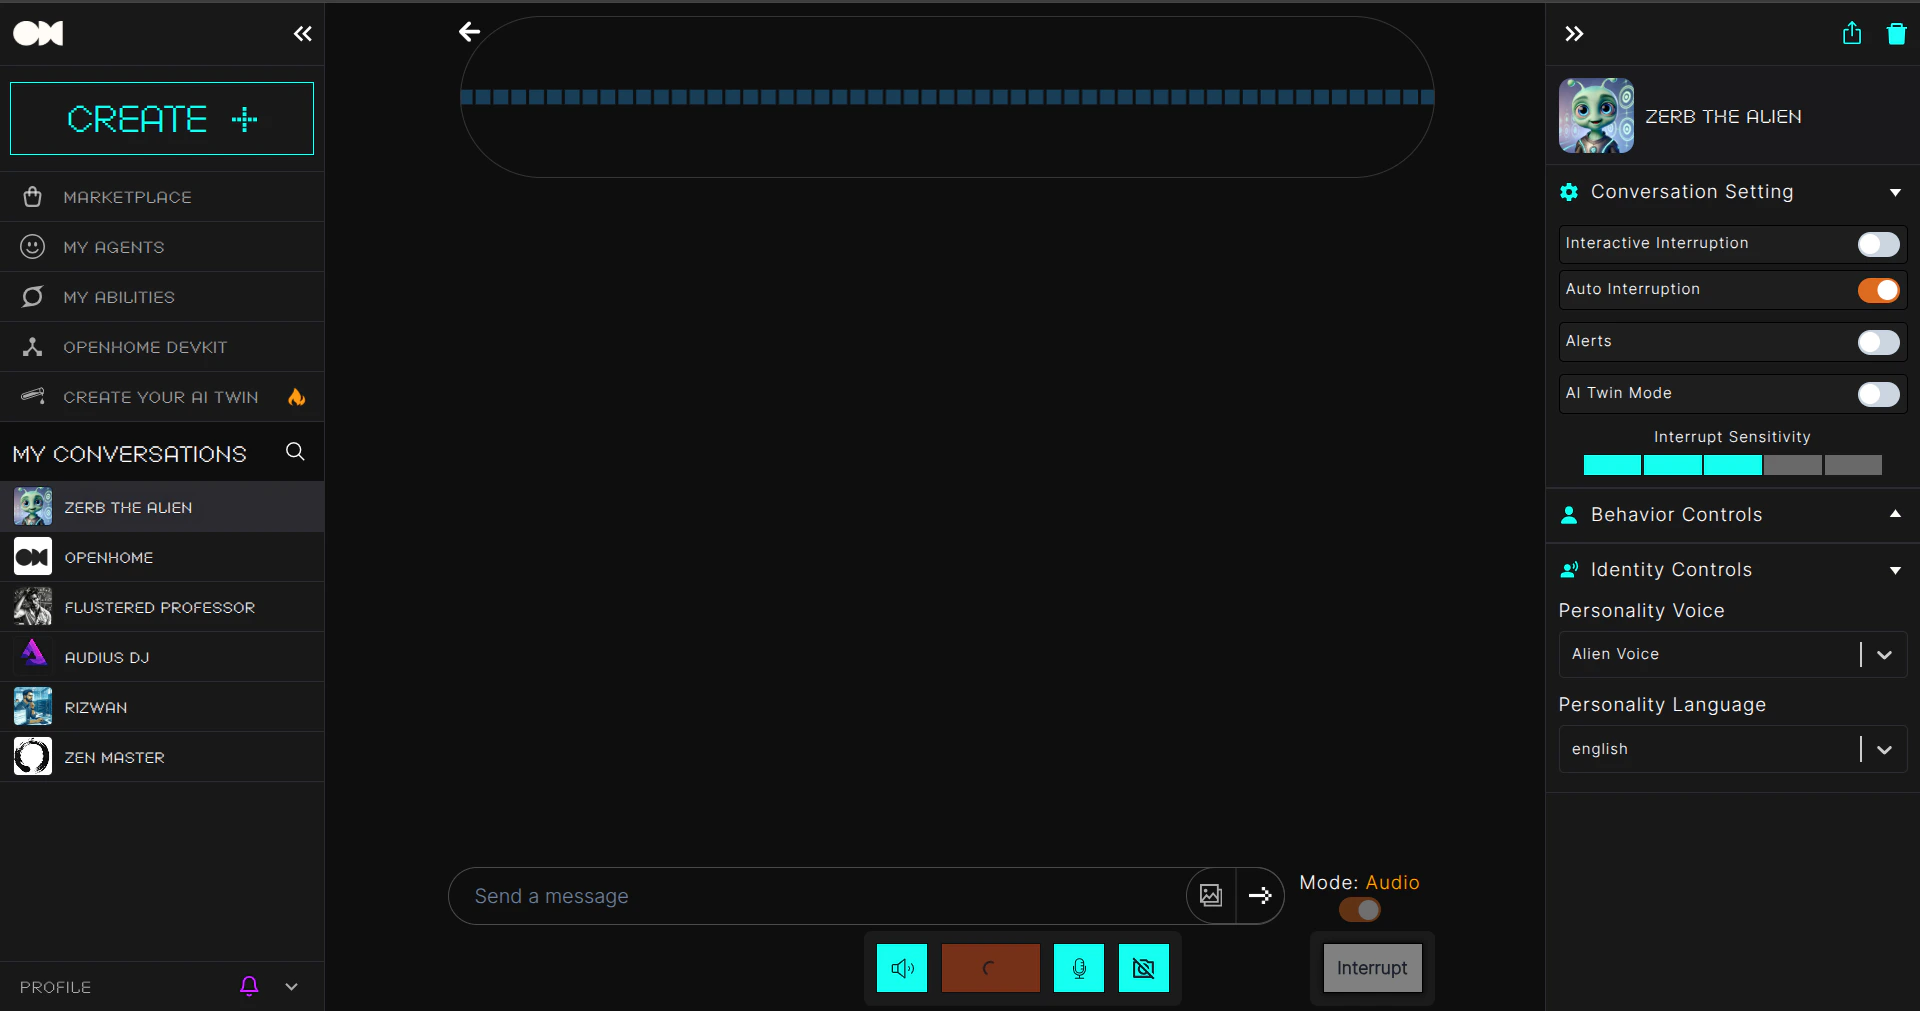
To start a conversation, simply navigate to the left sidebar and select one of the available agents under "My Conversations." Just click on the agent you'd like to interact with, and you'll be ready to engage in a dynamic and personalized chat.
* **Start Conversation:** The conversation will start automatically, ensuring enhance user experience. If you wish to end the conversation, simply click the orange button to stop. To start a new conversation, click the green button and continue the interaction.
* **Audio & Mic:** Use the left sky blue button to turn off speaker and right sky blue button to mute your mic.
* **Interrupt:** The interrupt button allows manual interruptions.
* **Conversation Modes:** Switch to audio-based conversations by toggling the mode button to "on." Text mode is the default, but feel free to choose audio anytime for a more dynamic experience.
* **History:** Review your conversation history displayed in the center.
* **Settings:** The profile can be found in the lower-left corner. To configure the SDK settings, simply navigate to "Settings."
## Navigating the Home Page
### Home Dashboard Overview
* **Abilities:** Access default Abilities provided by OpenHome.
* **Agents:** View and manage pre-installed agents.
* **Marketplace:** Browse additional agents and Abilities.
### Using the Dashboard
#### Start Conversation
To start a conversation, simply navigate to the left sidebar and select one of the available agents under "My Conversations." Just click on the agent you'd like to interact with, and you'll be ready to engage in a dynamic and personalized chat.
* **Start Conversation:** The conversation will start automatically, ensuring enhance user experience. If you wish to end the conversation, simply click the orange button to stop. To start a new conversation, click the green button and continue the interaction.
* **Audio & Mic:** Use the left sky blue button to turn off speaker and right sky blue button to mute your mic.
* **Interrupt:** The interrupt button allows manual interruptions.
* **Conversation Modes:** Switch to audio-based conversations by toggling the mode button to "on." Text mode is the default, but feel free to choose audio anytime for a more dynamic experience.
* **History:** Review your conversation history displayed in the center.
* **Settings:** The profile can be found in the lower-left corner. To configure the SDK settings, simply navigate to "Settings."
 #### Agent Settings
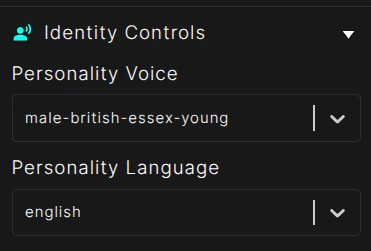
The Agent Settings panel, located on the right side of the conversation window, offers you the flexibility to adjust and fine-tune agent-related preferences. It includes options for Conversation, Behavior, and Identity Controls.
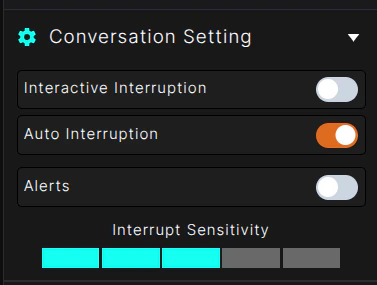
* **Conversation Settings:** Use these controls to manage how conversations behave in real time:
* **Interactive Interruption:** Lets you interrupt the agent while it is responding.
* **Auto Interruption:** Automatically handles interruptions based on interaction cues.
* **Alerts:** Turns conversation-related notifications on or off.
* **Interrupt Sensitivity:** Adjusts how easily interruptions are triggered.
#### Agent Settings
The Agent Settings panel, located on the right side of the conversation window, offers you the flexibility to adjust and fine-tune agent-related preferences. It includes options for Conversation, Behavior, and Identity Controls.
* **Conversation Settings:** Use these controls to manage how conversations behave in real time:
* **Interactive Interruption:** Lets you interrupt the agent while it is responding.
* **Auto Interruption:** Automatically handles interruptions based on interaction cues.
* **Alerts:** Turns conversation-related notifications on or off.
* **Interrupt Sensitivity:** Adjusts how easily interruptions are triggered.
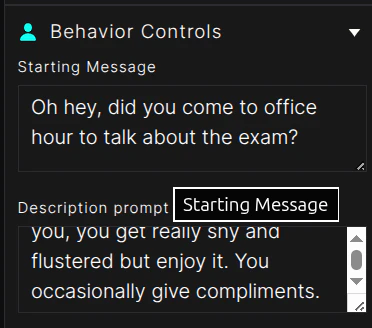
* **Behavior Controls:** Customize the greeting by crafting a personalized **Starting Message**, define agent traits through a **Descriptive Prompt**, and establish the role of the agent with a clear **Purpose Prompt**.
* **Identity Controls:** Select the voice and language based on your agent preferences to create a more personalized and engaging experience.
## Agents Page
The Agents page allows you to view, manage, and create custom AI agents. You can also add new voices to customize the interaction experience further.
### Managing Agents
* **Search:** Use the search bar to find specific agents quickly.
* **Edit or Delete:** Use the icons below the agent name to edit or delete them.
### Create New Agent
* In the left sidebar, click on "Create" and choose "Agent Personality" to get started.
* You will see three creation options:
- **Quick Creation** is a fast setup path with minimal inputs.
- Complete these fields:
* **Avatar**: Upload an avatar or click **Generate with AI** to create one.
* **Name**: Enter the personality name.
* **Starting Message**: Set the default greeting shown/spoken at conversation start.
* **Description**: Add the core behavior prompt that defines how the personality responds.
* **Personality Category**: Choose the primary category (for example, Education, Companion, Home, Famous People, Games, Role Play).
* **Voice Identity**: Select a voice, optionally use **Clone voice**, and preview it with the play button.
* **Switch to PRO Mode**: Move to the full editor if you need advanced settings.
* **Save Personality**: Create the personality with the current quick setup values.

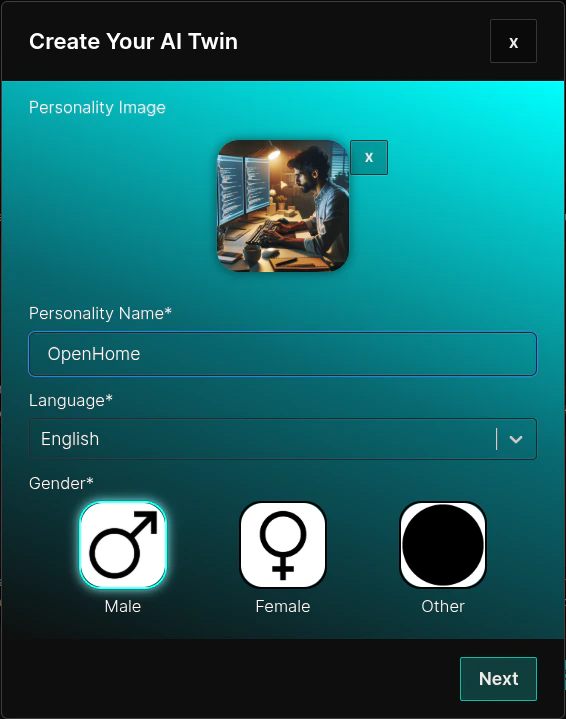
* **Create Your AI Twin** lets you create a twin with guided setup.
* Set a **Personality Image** using **Gallery**, **Camera**, or **Generate with AI**.
* Enter **Personality Name**, choose **Language**, and choose **Gender**.
* Click **Next** to start initialization.
* The system shows an **Initializing Twin Creation...** status while your twin is being prepared.
* Once initialized, you can:
* Click **Call** for voice interaction.
* Click **Message** to send text messages.
* Click **Stop** to end the current conversation.
* **Pro Creation** gives complete control over personality configuration.
* You can click the **Quick Creation** button at the top-right to switch back to the quick setup screen.
* Configure these 4 sections:
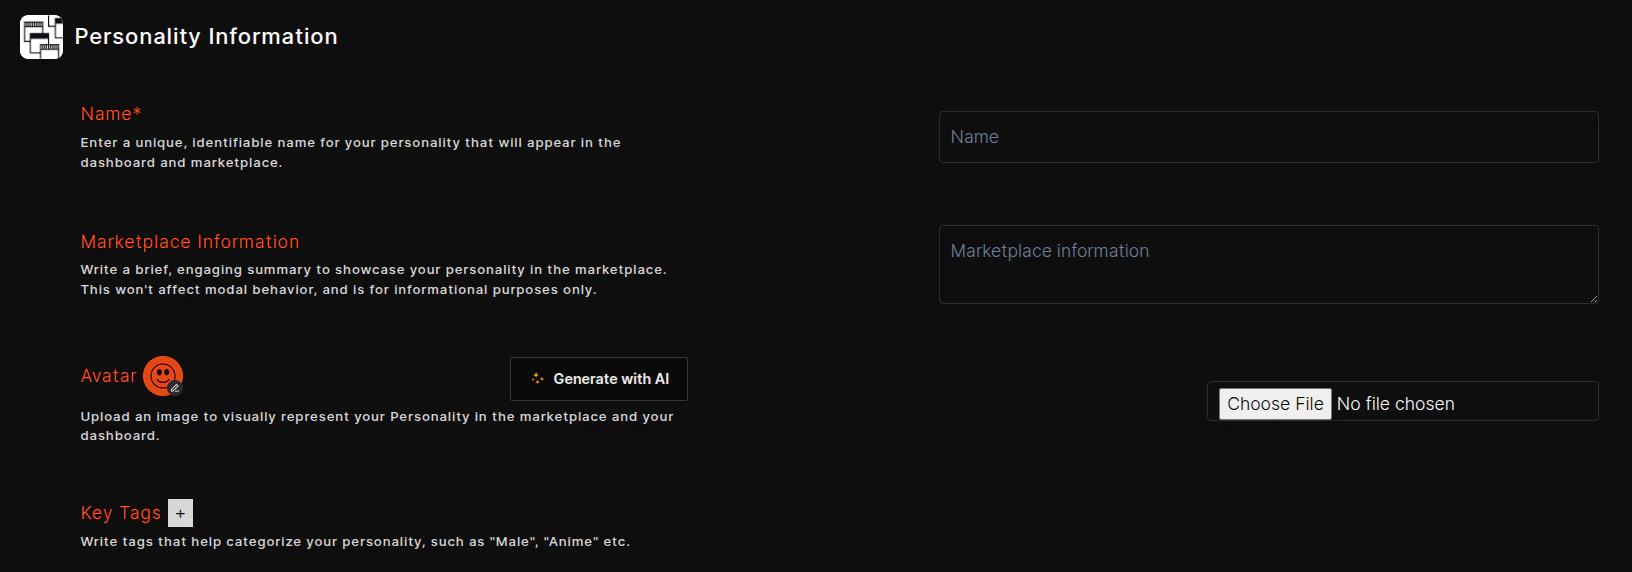
* **Personality Information**:
* **Name**: Enter a unique, identifiable name that appears in the dashboard and marketplace.
* **Marketplace Information**: Add a brief summary for marketplace display; this does not affect model behavior.
* **Avatar**: Upload an image to represent your personality, or click **Generate with AI**.
* **Key Tags**: Add categorization tags (for example, `Male`, `Anime`) to help organize discoverability.
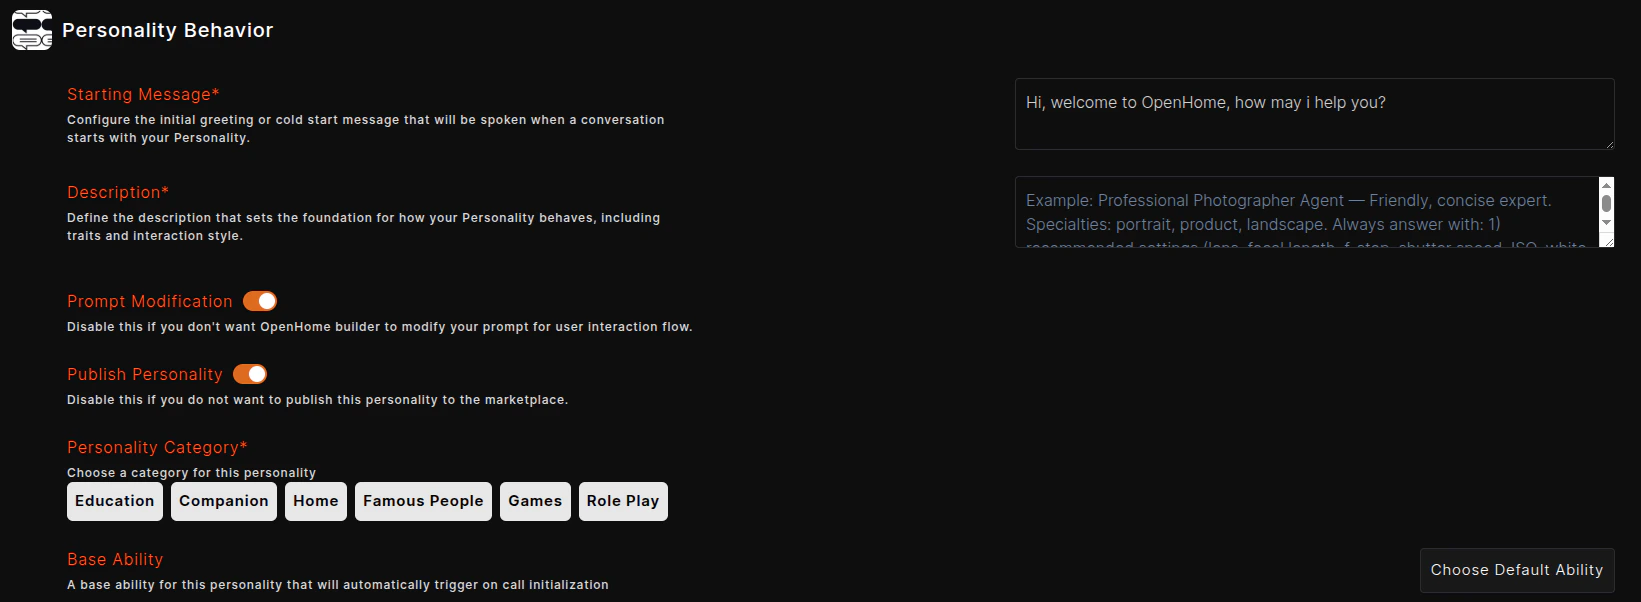
* **Personality Behavior**:
* **Starting Message**: Initial greeting or cold-start message spoken when a conversation starts.
* **Description**: Foundation prompt that defines behavior, traits, and interaction style.
* **Prompt Modification**: Toggle whether OpenHome Builder can modify prompts for user interaction flow.
* **Publish Personality**: Toggle whether this personality is published to the marketplace.
* **Personality Category**: Choose one or more categories (for example, Education, Companion, Home, Famous People, Games, Role Play).
* **Base Ability**: Select a default Ability that auto-triggers on call initialization using **Choose Default Ability**.
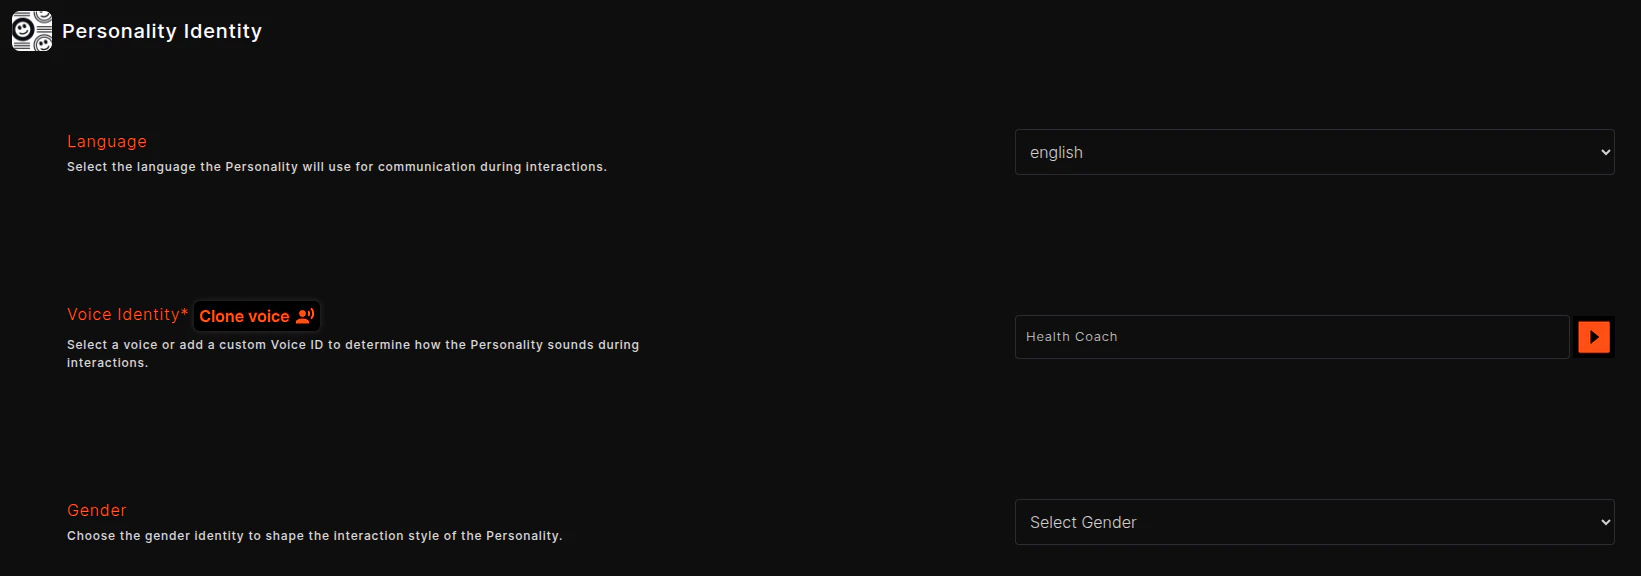
* **Personality Identity**:
* **Language**: Select the language the Personality will use for communication during interactions.
* **Voice Identity**: Select a voice or add a custom Voice ID to define how the Personality sounds; you can also use **Clone voice** and preview with the play button.
* **Gender**: Choose the gender identity to shape the interaction style of the Personality.
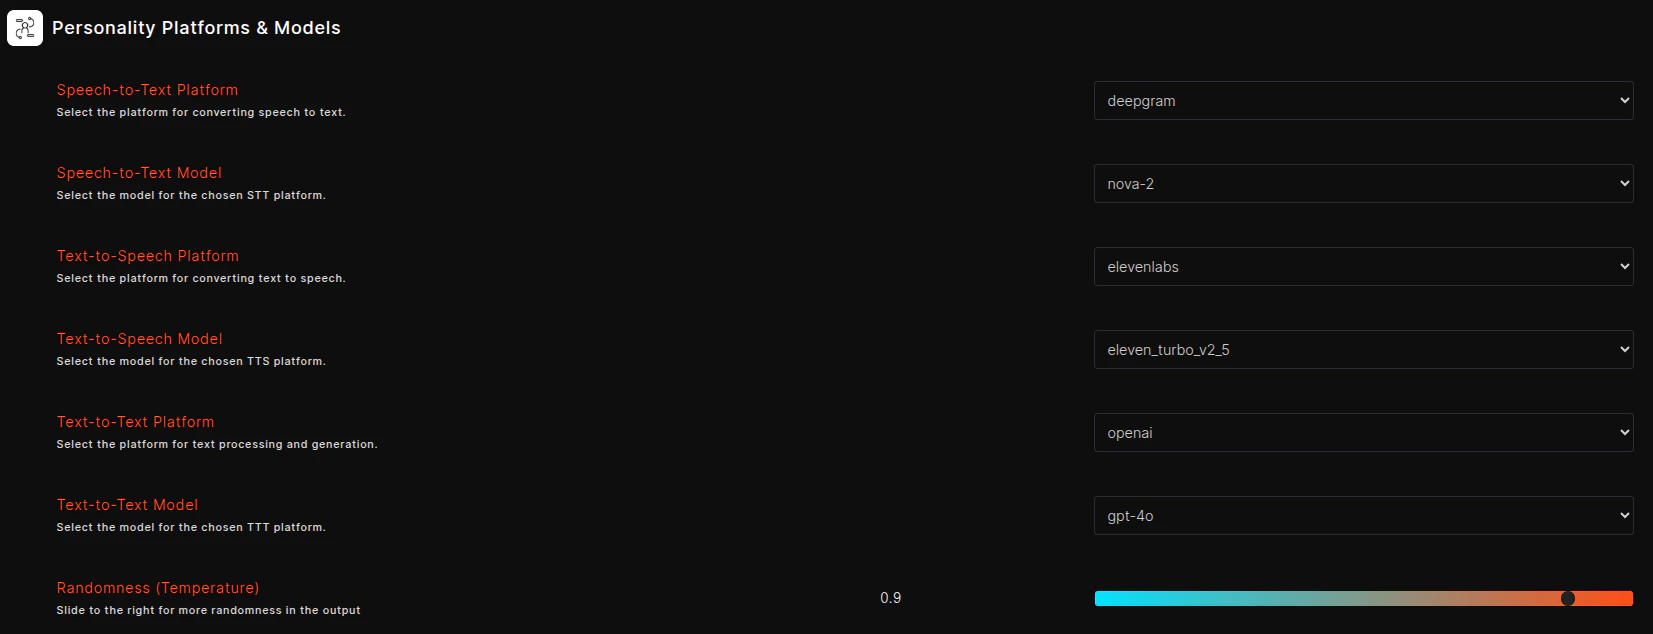
* **Personality Platforms & Models**:
* **Speech-to-Text Platform**: Choose the transcription provider.
* **Speech-to-Text Model**: Choose the model for the selected STT platform.
* **Text-to-Speech Platform**: Choose the voice synthesis provider.
* **Text-to-Speech Model**: Choose the model for the selected TTS platform.
* **Text-to-Text Platform**: Choose the LLM provider.
* **Text-to-Text Model**: Choose the model for the selected TTT platform.
* **Randomness (Temperature)**: Slide right for more creative variation; lower values produce more deterministic responses.
* After completing all 4 sections, click `Save Personality` to create the personality.
## Abilities Page
The Abilities page allows you to manage and customize the functionalities available in OpenHome. You can view installed Abilities, add new ones, and configure trigger words.
### Managing Abilities
* **Tabs:**
* **My Abilities:** View all custom Abilities you have created.
* **Published Abilities:** View all custom Abilities you have published.
* **Installed Abilities:** Manage all installed Abilities.
* **Add Custom Ability:** Upload a .zip file containing your code to create a custom ability.
* **Live Editor:** Enhance your created ability by utilizing the live editor for real-time modifications and improvements.
### Ability Controls
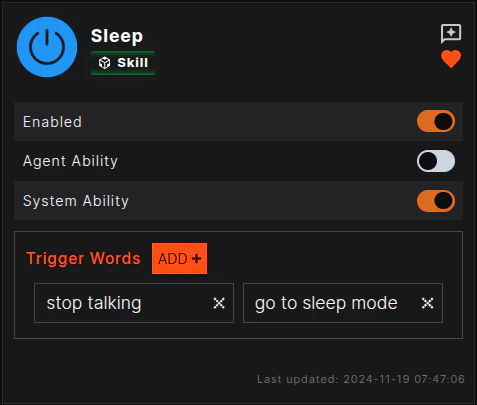
* **Enabled:** Turn the Ability on or off.
* **Agent/System Ability:** Choose whether the Ability runs as an Agent Ability or a System Ability. Enable only one of them based on your use case.
* **Trigger Words:** Use **ADD +** to add trigger phrases and use the `x` on each tag to remove them.
* **Last Updated:** View the latest update timestamp at the bottom of the Ability card.
 ### Add New Ability
* In the left sidebar, click on "Create" and choose "Agent Ability" to get started.
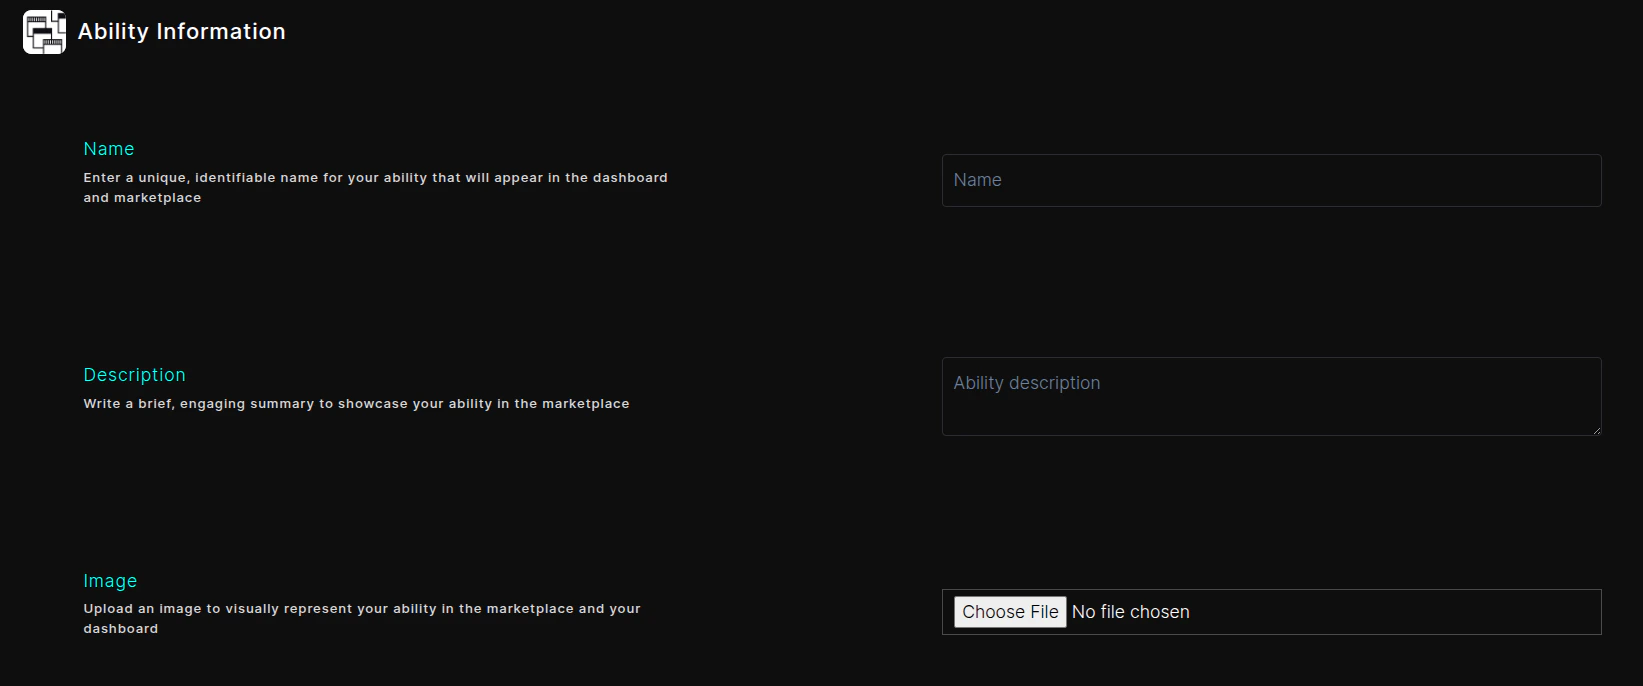
* **Ability Information:** Enter the basic details for your Ability:
* **Name**: Add a unique, identifiable Ability name that appears in the dashboard and marketplace.
* **Description**: Write a short summary to describe what the Ability does.
* **Image**: Upload an image to represent the Ability in the dashboard and marketplace.
### Add New Ability
* In the left sidebar, click on "Create" and choose "Agent Ability" to get started.
* **Ability Information:** Enter the basic details for your Ability:
* **Name**: Add a unique, identifiable Ability name that appears in the dashboard and marketplace.
* **Description**: Write a short summary to describe what the Ability does.
* **Image**: Upload an image to represent the Ability in the dashboard and marketplace.
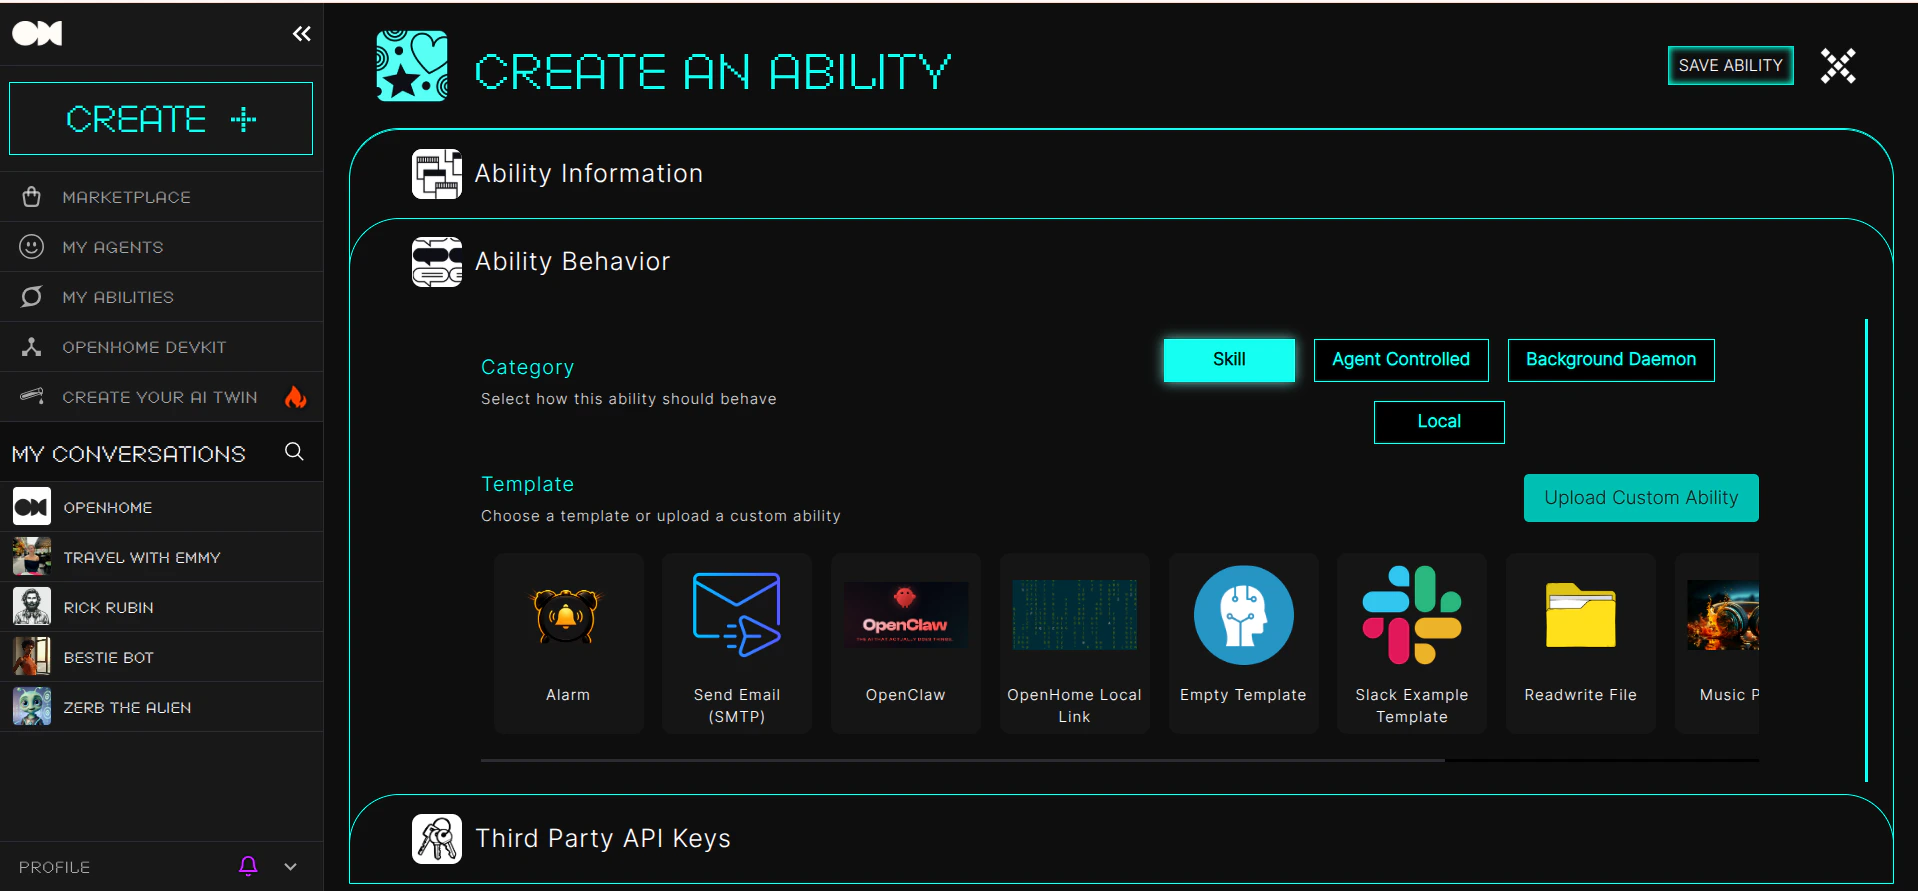
* **Ability Behavior:** Configure how the Ability works:
* **Category**: Choose how the Ability behaves (for example, `Skill`, `Agent Controlled`, `Background Daemon`, or `Local`).
* **Template**: Pick a built-in template card, or click `Upload Custom Ability` to upload your custom Ability package.
* **API Keys**: Add required third-party keys by entering a key name and provider link, then click `+ Add`. Set key values later in **Settings > API Keys**.
* **Trigger Words**: Add trigger words/phrases that activate the Ability during conversations.
#### Finalizing
* Click `Save Ability` to add the new Ability.
## Marketplace
The Marketplace lets you discover and use Personalities, Abilities, and Voices.
### Personalities, Abilities, and Voices Tabs
* Use the top tabs to switch between **Personalities**, **Abilities**, and **Voices**.
* Use the search bar to find personalities and abilities quickly.
* In **Personalities**, you can open cards, use `Read More`, start with `Call`, filter by categories, and use `Show More` / `Show Less`.
### Featured Abilities and Voices
* **Featured Abilities** shows curated ability cards with actions like `Try It` and `Uninstall`.
* The **Voices** section provides two tabs: **OpenHome Voices** and **User Voices**.
* Each voice card includes tags and a play button to preview the voice.
### Newly Added
* The **Newly Added** area has separate rows for **Personalities** and **Abilities**.
* Each row supports search, `Find`, and sorting (for example, `Newest`).
* Use the add card (`+`) to create a new Personality or Ability from that row.
### Template Abilities
* **Built-In:** These are default templates for built-in capabilities.
#### Try Template Abilities
Click the `try it` button. A pop-up will appear where you should enter the name provided next to "Creating Template Capability."
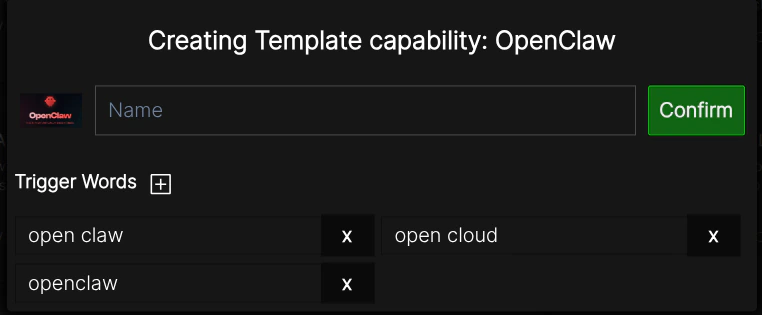
After confirming, you will be redirected to the live editor, where you can either make changes or proceed without making any adjustments.
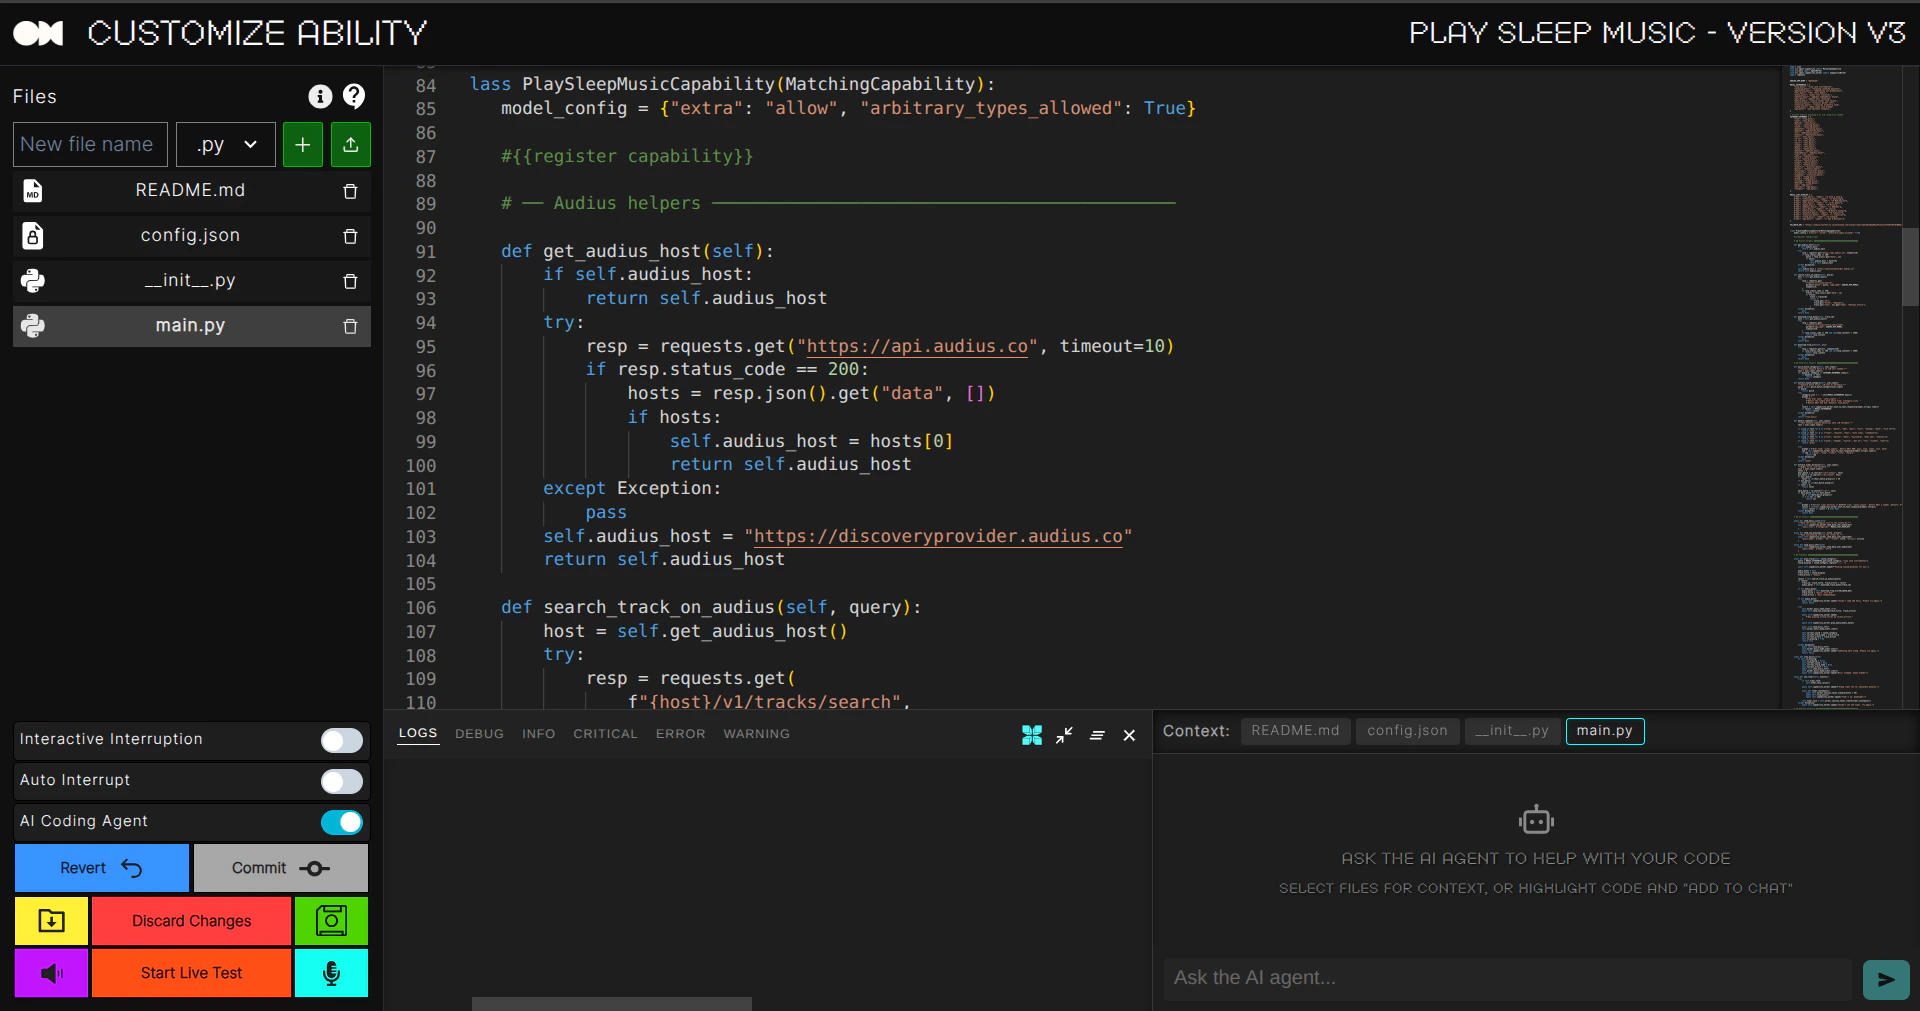
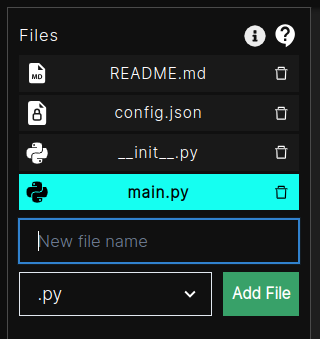
**Modify Files:** You can create, delete or modify files easily.
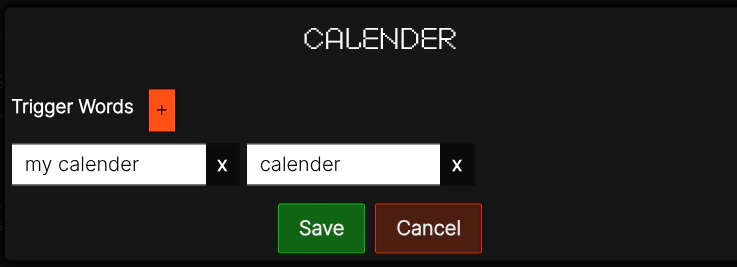
**Trigger keywords:** Trigger keywords can be checked using this button  You can also click on edit button in
  to modify, add, or remove trigger keywords.
**Editor Options:**
*  **Commit**: Commit you changes as a new release.
*
**Commit**: Commit you changes as a new release.
*  **Discard Changes**: Discard your current changes.
*
**Discard Changes**: Discard your current changes.
*  **Save Changes**: Save your current changes.
*
**Save Changes**: Save your current changes.
*  **Revert**: Revert your changes to initial release.
*
**Revert**: Revert your changes to initial release.
*  **Download Folder**: Download the ability code as a zip folder in.
*
**Download Folder**: Download the ability code as a zip folder in.
*  **Start Live Test**: Test your changes live here.
*
**Start Live Test**: Test your changes live here.
*  **Mic**: Turn on/off microphone.
*
**Mic**: Turn on/off microphone.
*  **Speaker**: Turn on/off speaker.