

This guide is for users without an iPhone. If you have an iOS device, we recommend the OpenHome - Voice AI DevKit App for the easiest setup.
Before you start
You need:-
The OpenHome CLI installed. If you don’t have it yet, run:
Already have it? Run the same command again to update to the latest version.
-
Your API key. Get it from app.openhome.com → Settings → API Keys, then sign in once so the CLI can offer your key during setup:
- Your Wi-Fi name and password. 2.4 GHz networks are the most reliable choice.
- Bluetooth turned on on your computer.
- The DevKit powered on and within a few metres of your computer.
Step 1: Start the setup

- One DevKit in range: it is selected automatically.
- More than one: you’ll see a list. Type the number of your DevKit and press Enter, or type
rto scan again. - None found: check that the DevKit is on and close by, then answer y to “Scan again?”.
Step 2: Check the current state
The CLI connects to the DevKit and shows what it is doing right now.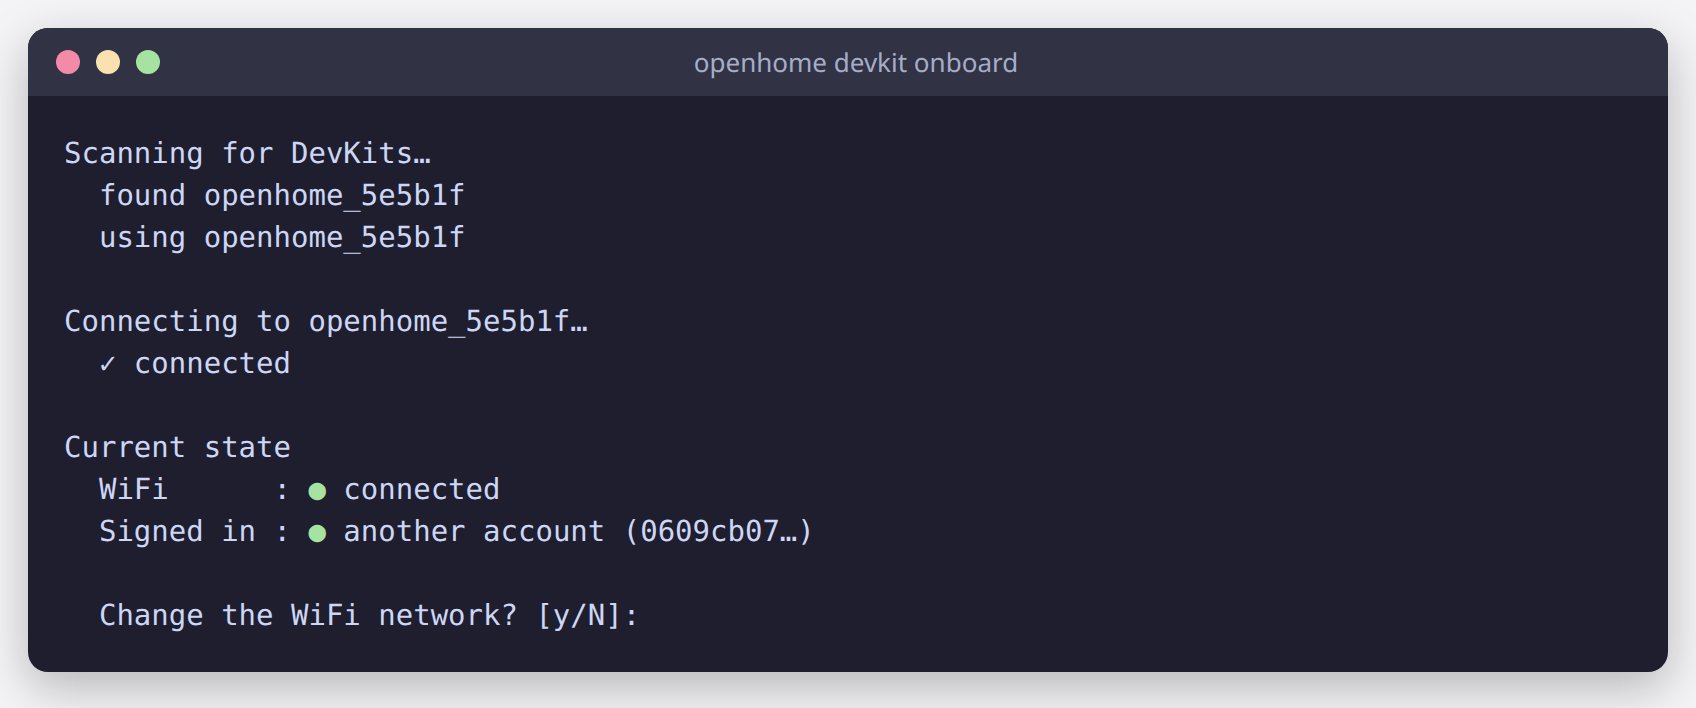
If the DevKit is already on Wi-Fi, you are asked “Change the WiFi network?”:
- Press Enter (or type
n) to keep the current network and go to Step 5. - Type y to choose a different network.
Step 3: Choose your Wi-Fi network
The DevKit scans for the networks around it. This takes a few seconds.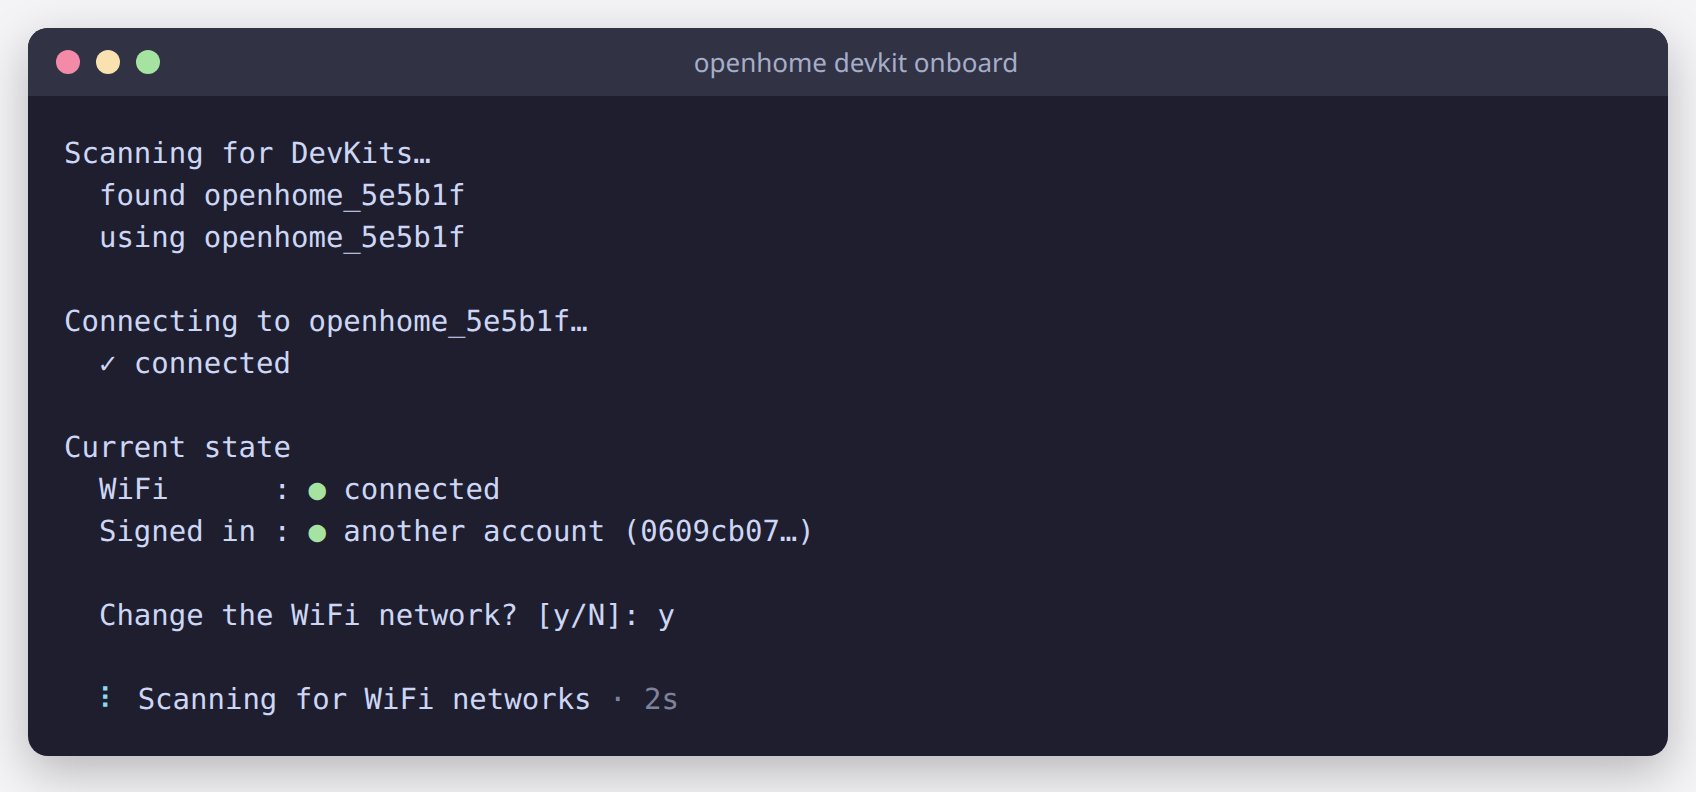
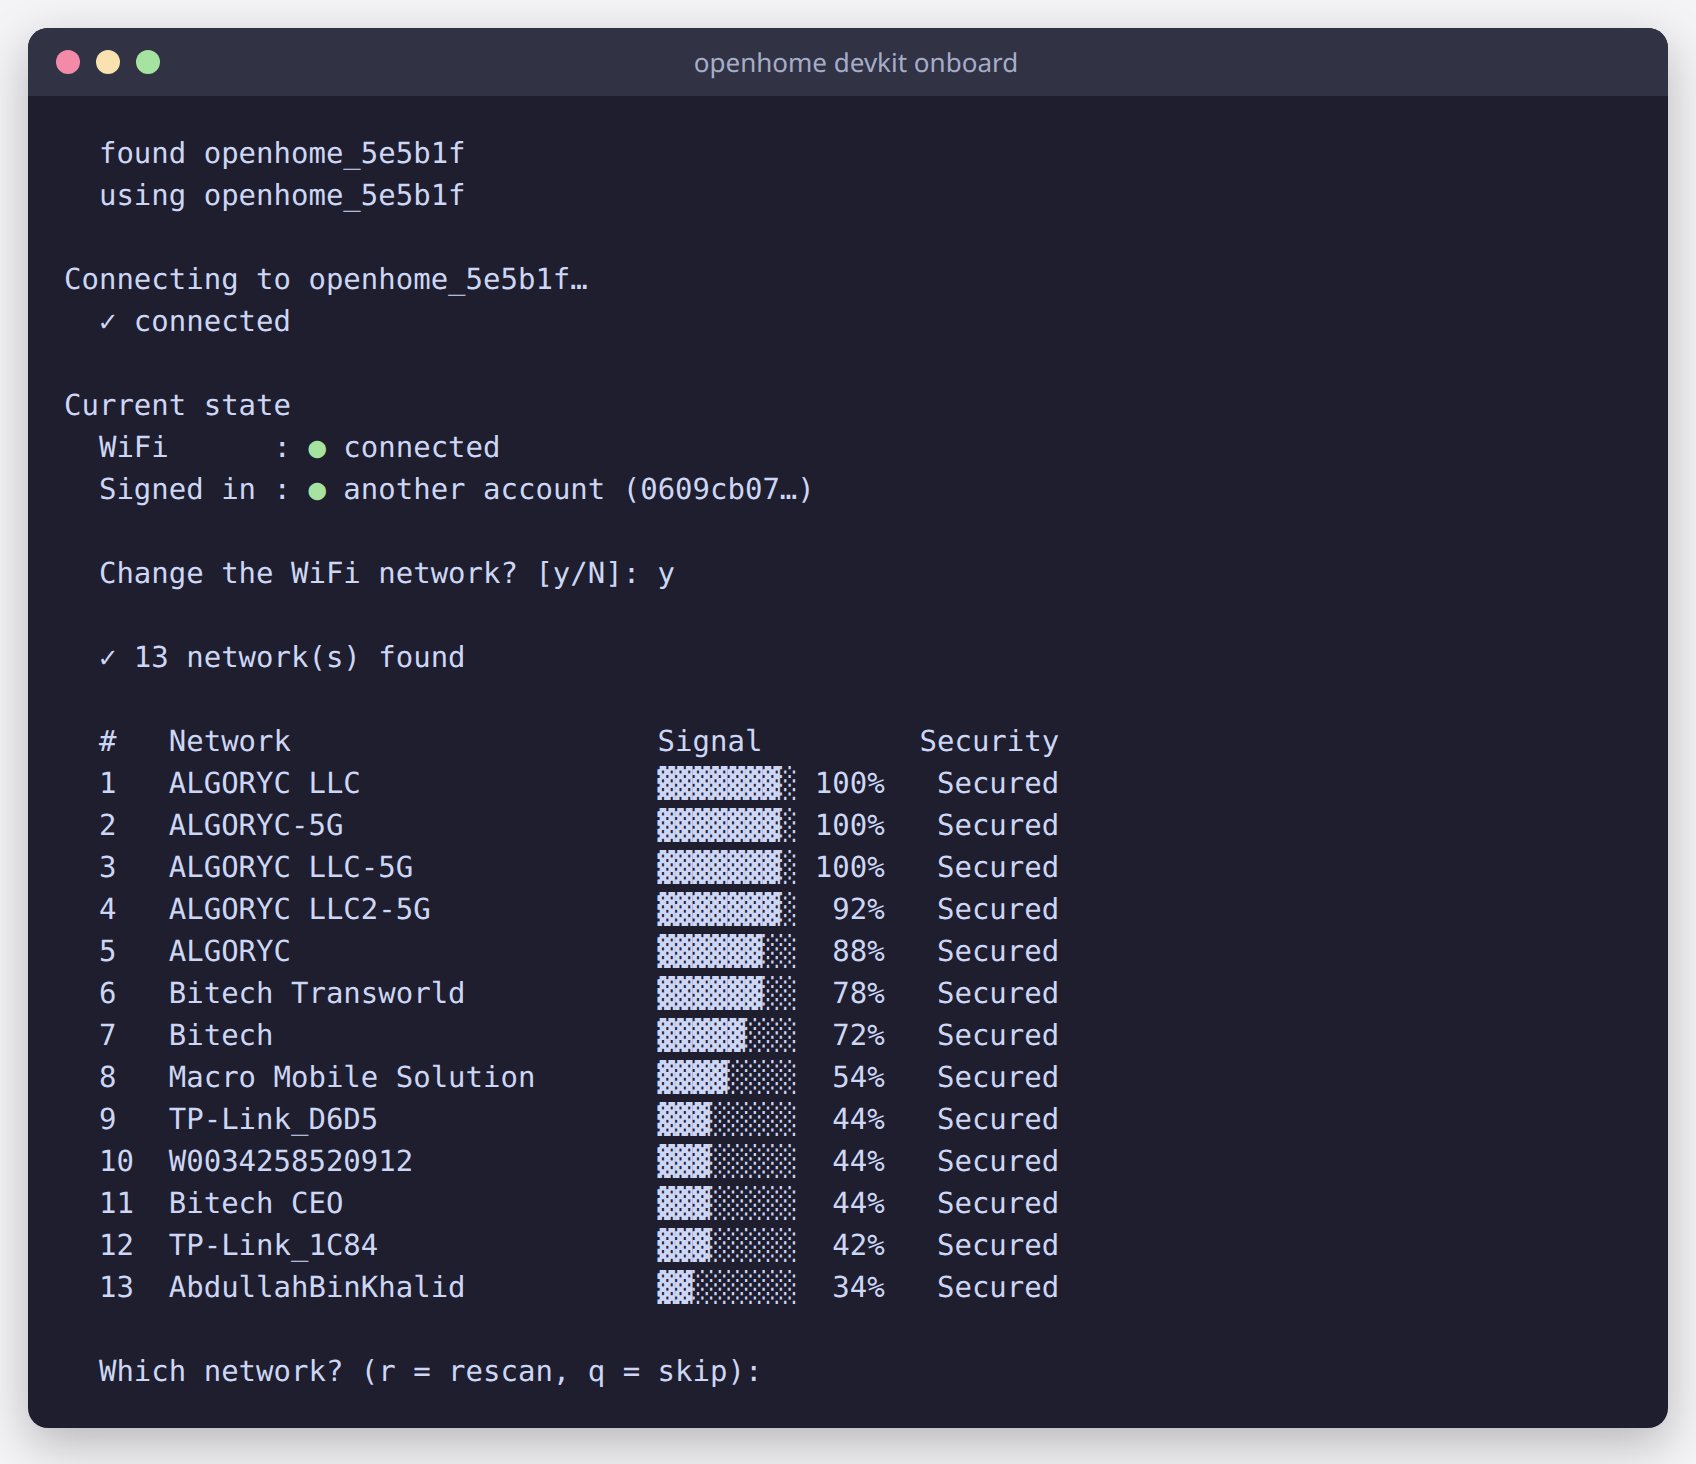
- Don’t see your network? Type
rto scan again. - Want to set up Wi-Fi later? Type
qto skip it. The DevKit needs Wi-Fi to reach your account, though.
Step 4: Enter the Wi-Fi password
Type your Wi-Fi password and press Enter. Nothing appears on screen as you type, which is normal and keeps your password private. The DevKit then tries to join the network. A timer shows how long it has been trying, and this usually takes 10 to 15 seconds.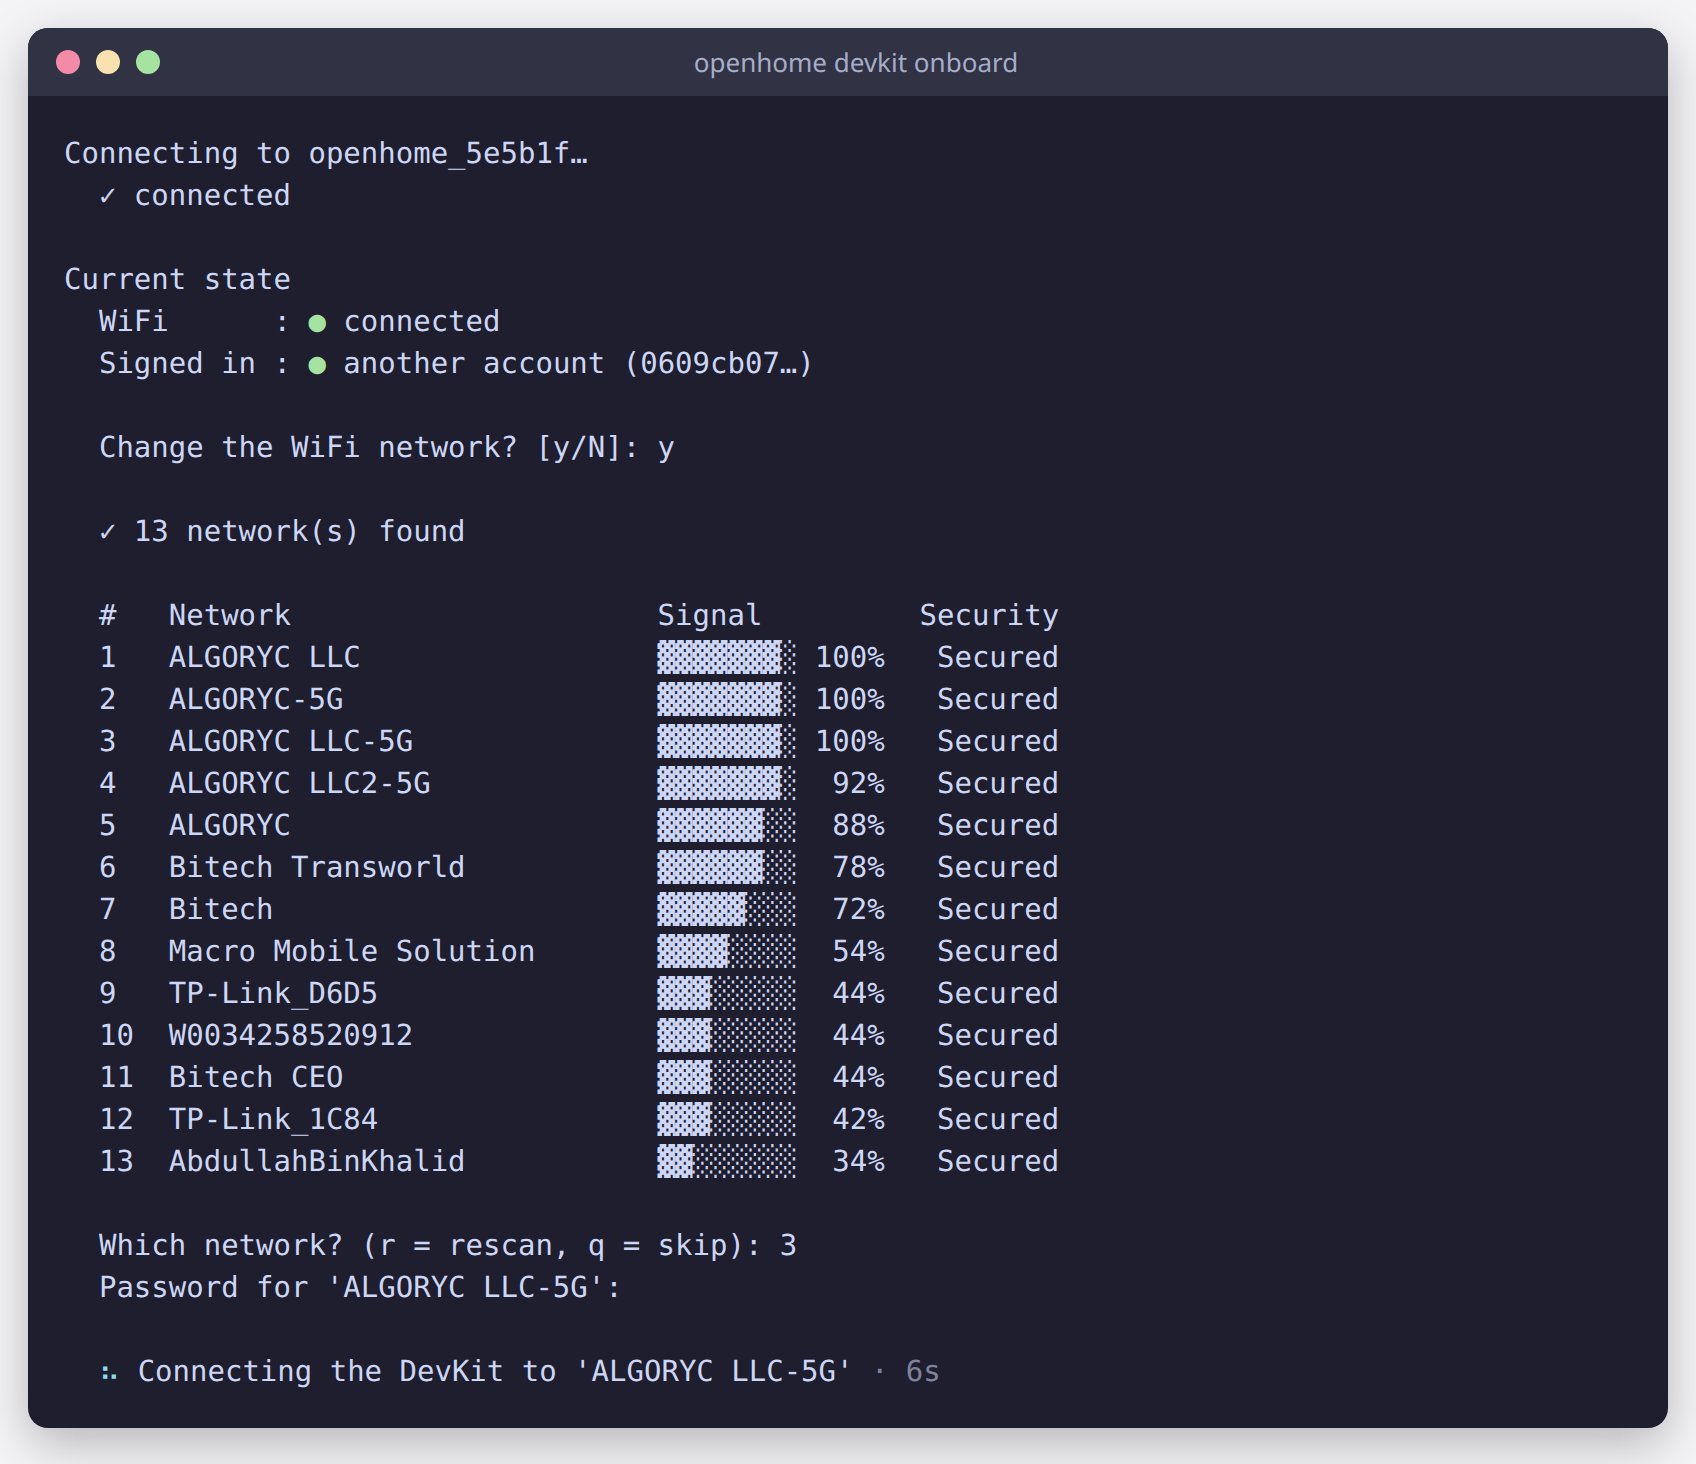
If it doesn’t connect
You don’t have to start over. The CLI lets you try again right away.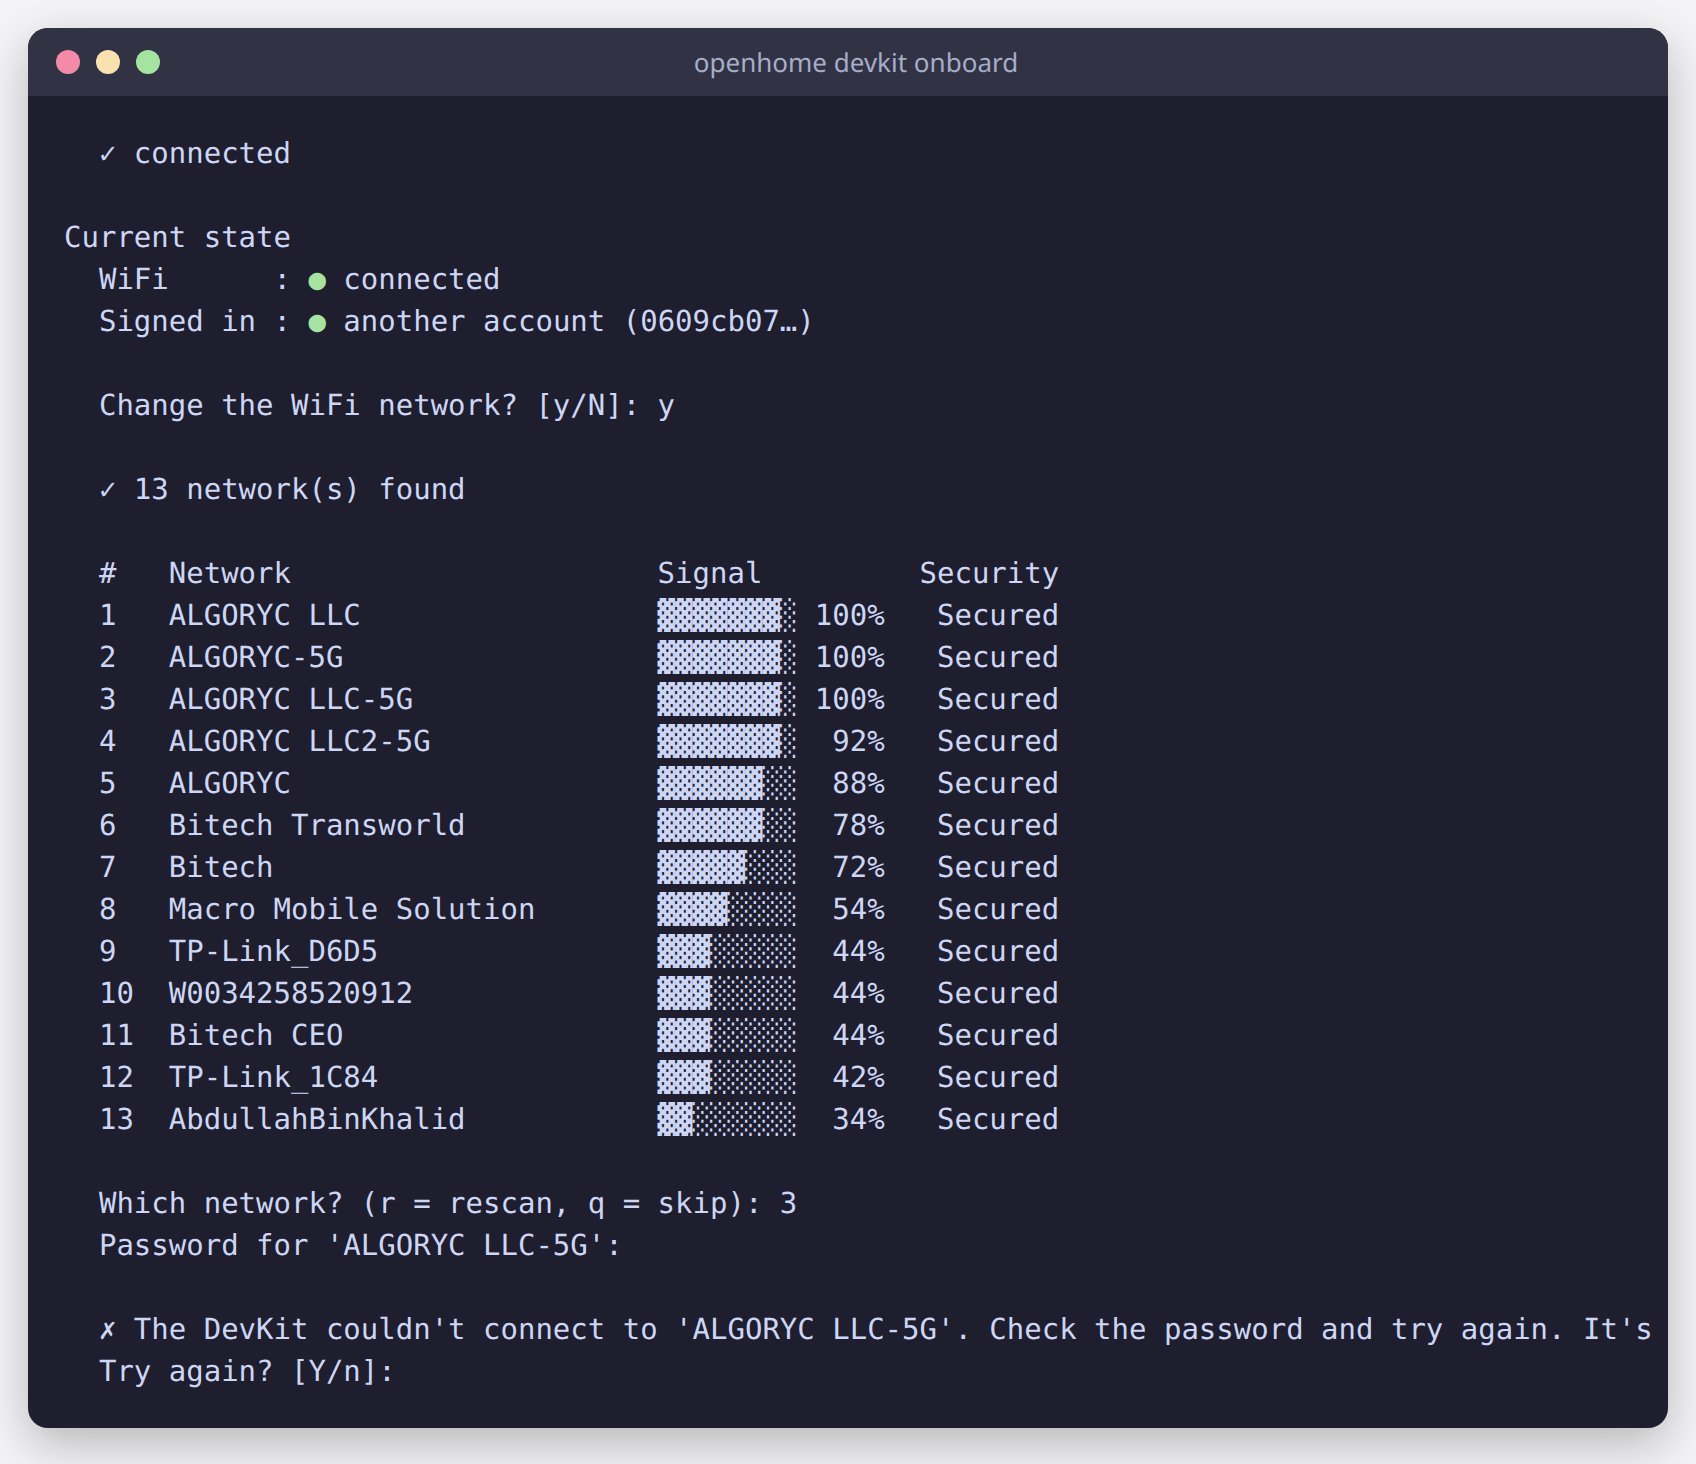
- “Wrong password for ’…’”: answer y to “Enter the password again?”, then type the correct password.
- “The DevKit couldn’t connect to ’…’. Check the password and try again.”: answer y to “Try again?”, pick the network again, and re-enter the password.
- If it says “It’s still connected to ’…’”, the DevKit has gone back to its previous network, so it stays online.
On some DevKits a wrong password takes up to about 45 seconds to be reported. Wait for the message, because the CLI is waiting for the DevKit.
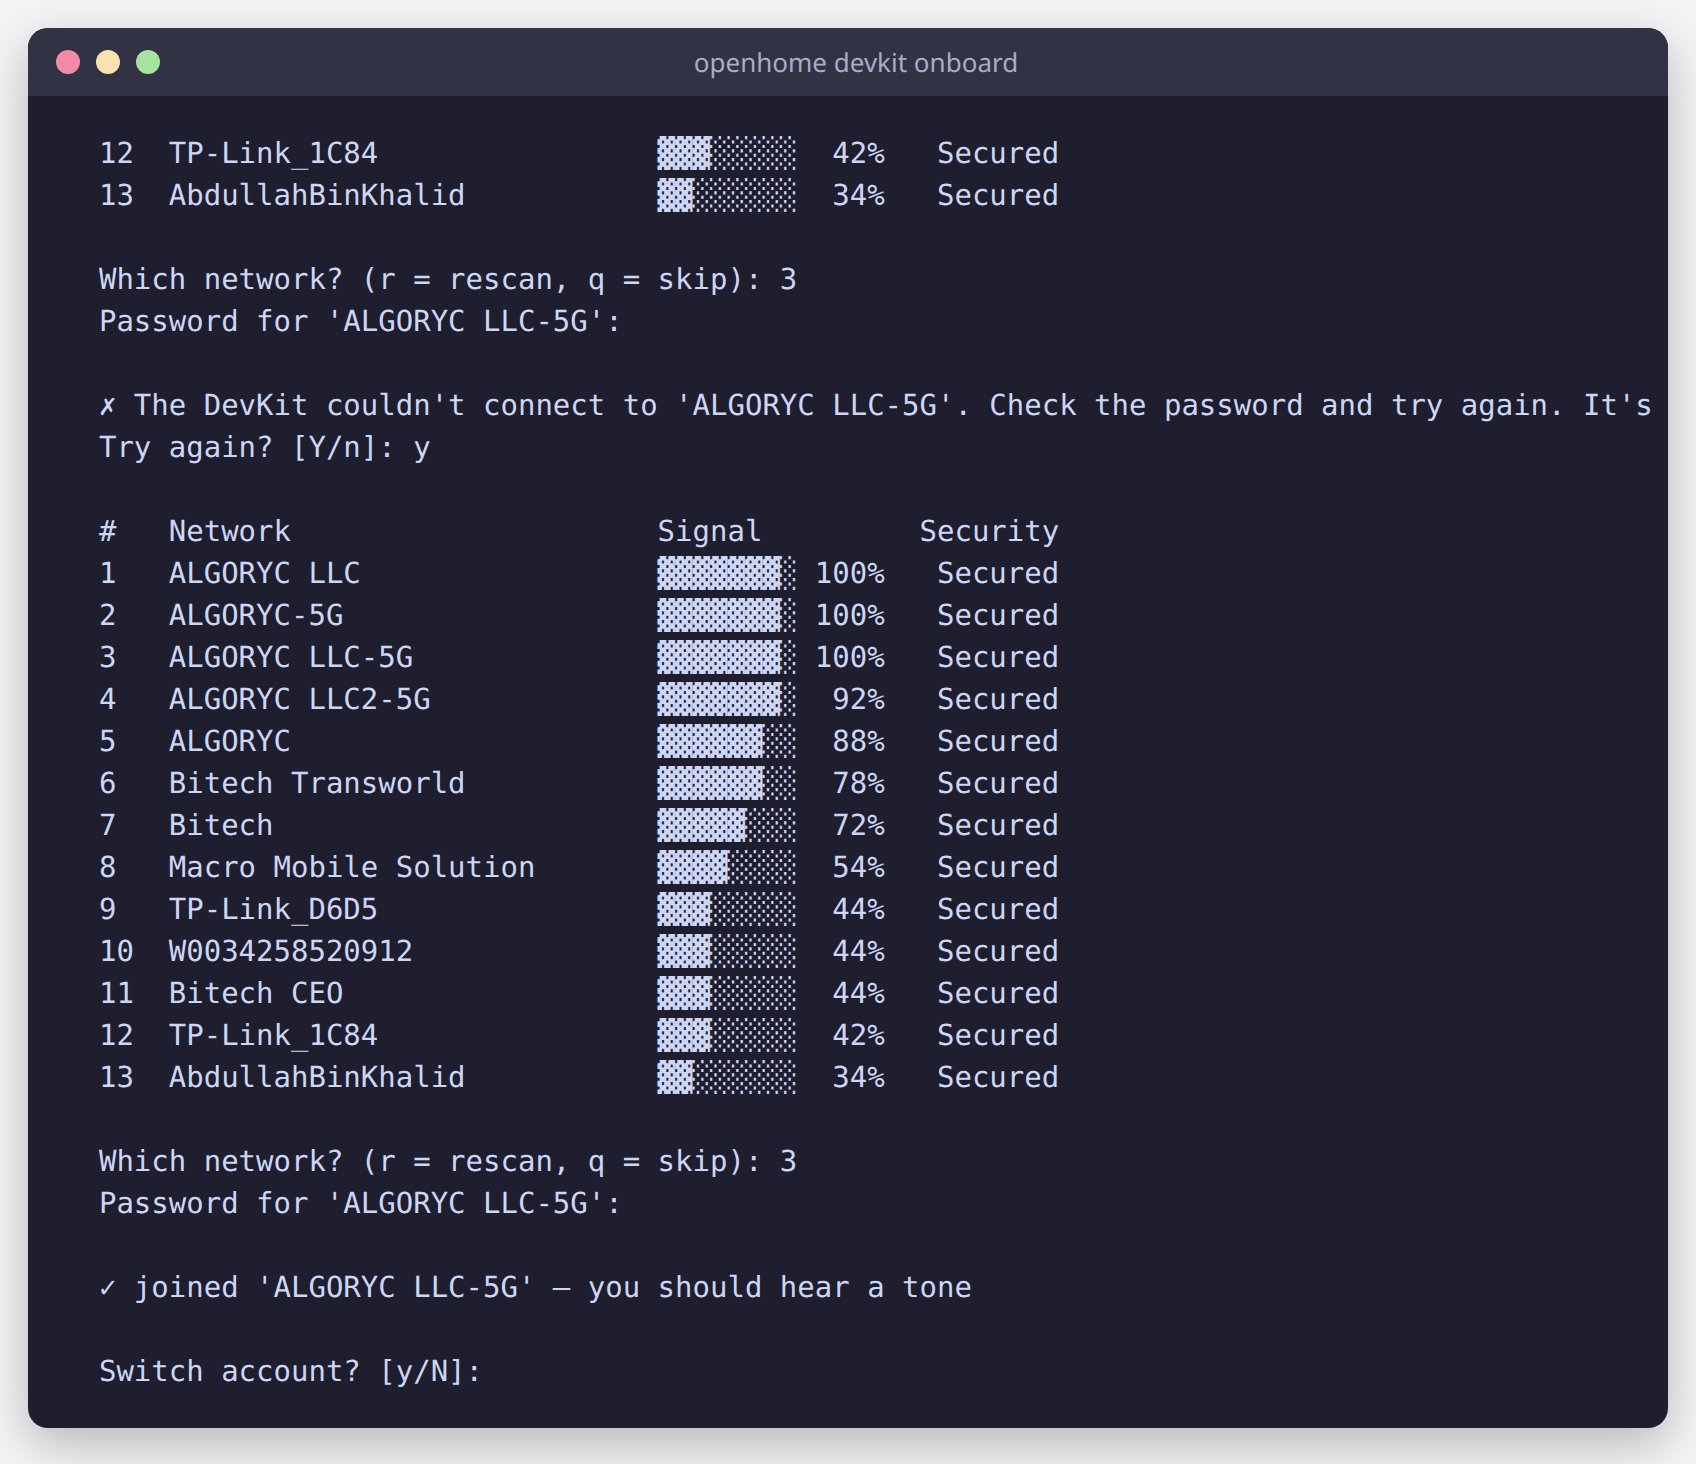
Step 5: Sign in
Next, the DevKit is linked to your OpenHome account. If the DevKit isn’t signed in yet:- The CLI offers the API key you saved with
openhome login, and shows whose account it belongs to, with the key partly hidden. - Confirm it, or paste a different API key.
- The CLI shows whose account a new key belongs to before sending it to the DevKit.
- Press Enter (or type
n) to keep the current account. - Type y to sign it in to a different account.
Step 6: Done
The CLI waits for the DevKit to come online, then shows a summary: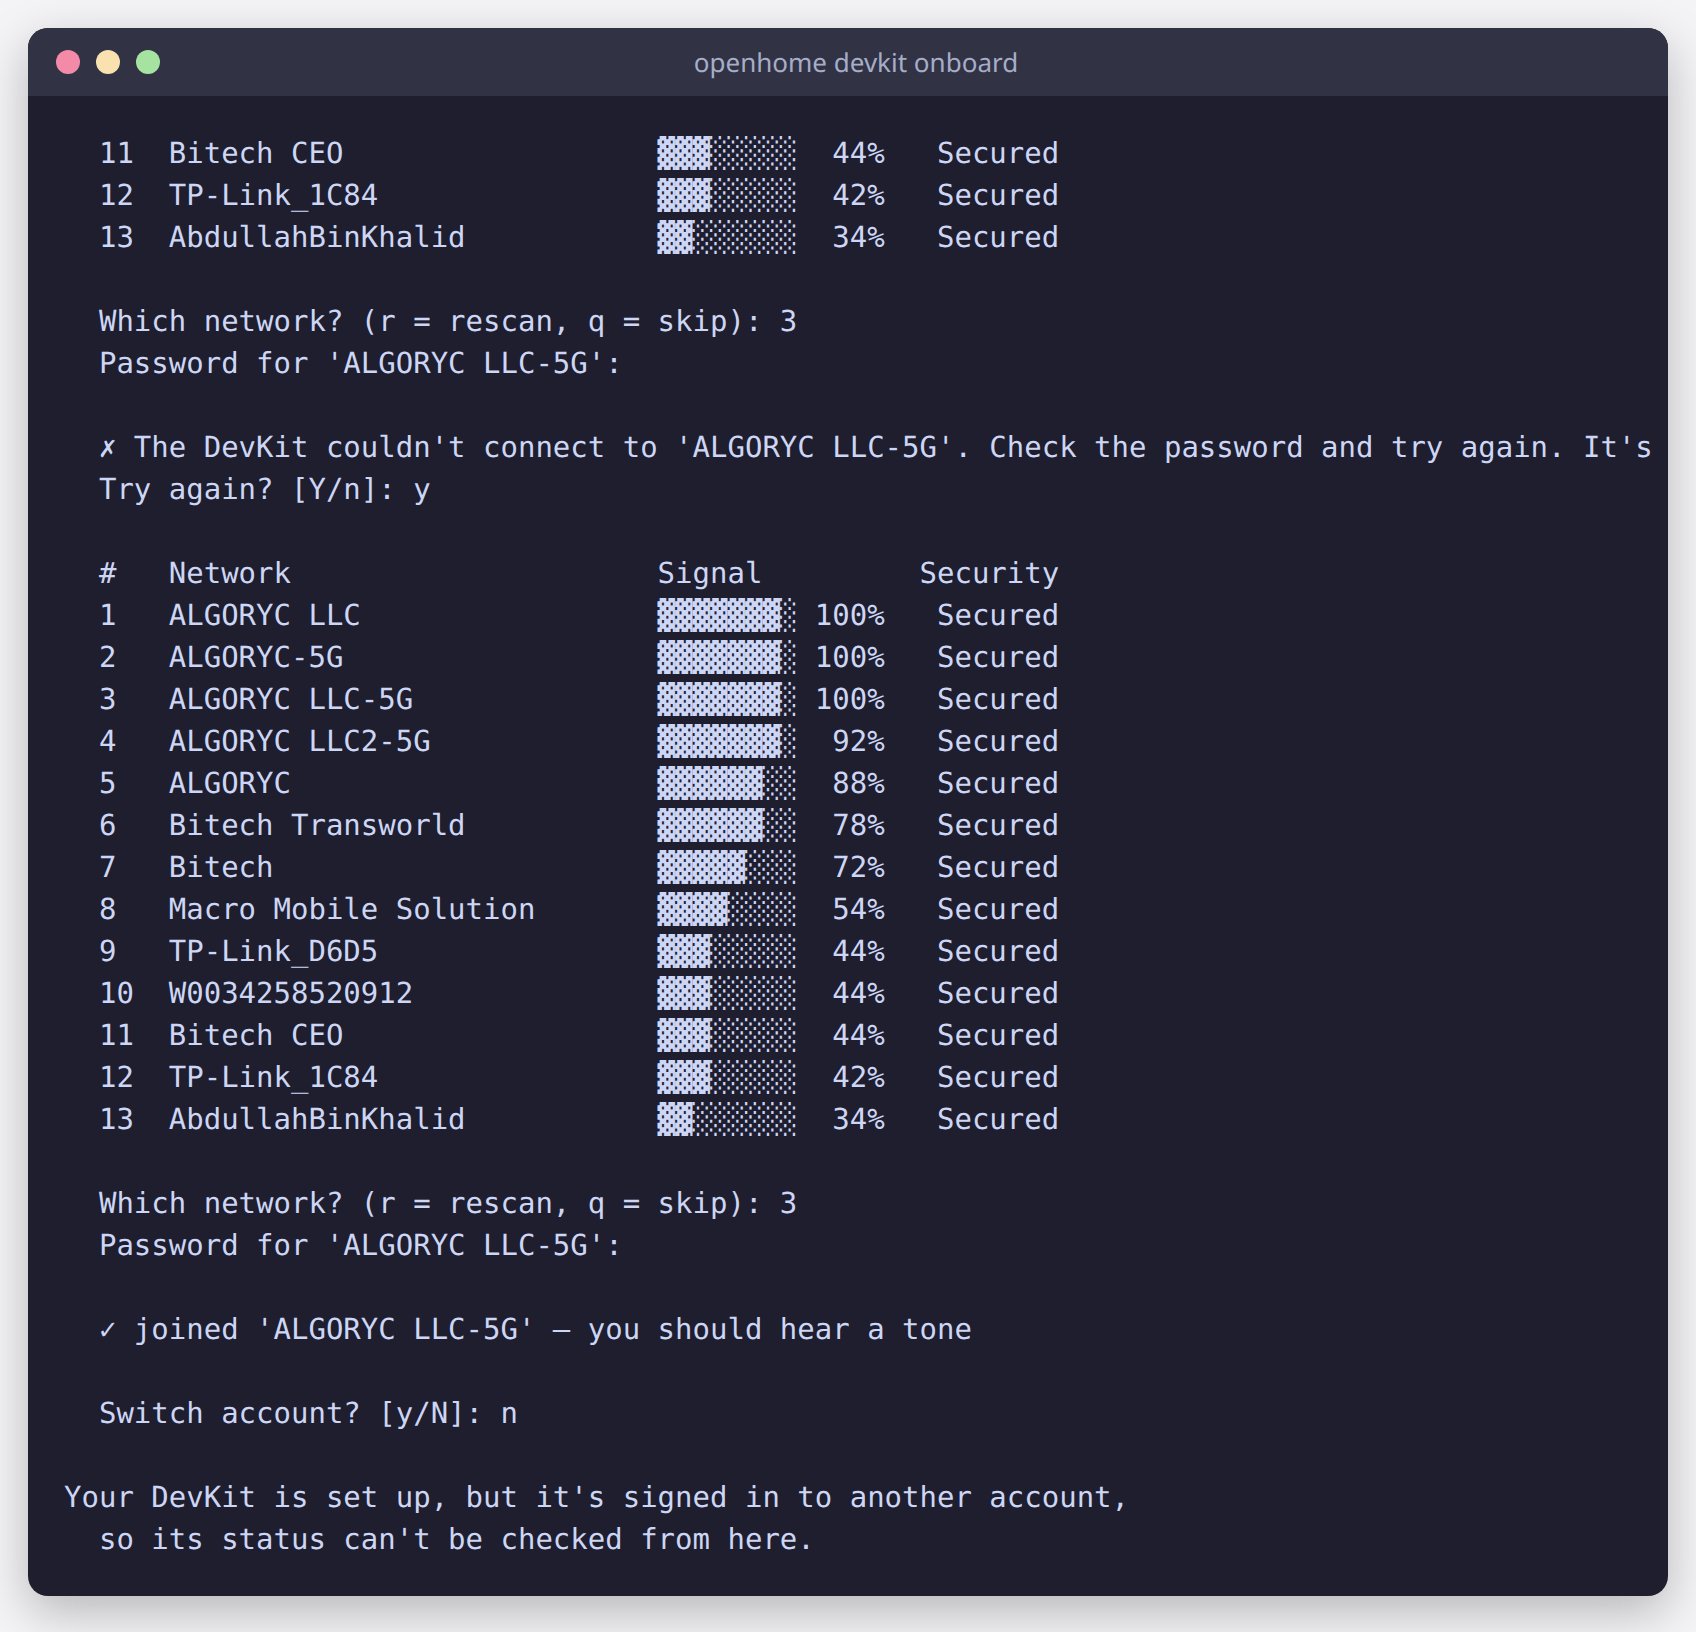
Checking on your DevKit later
Once the DevKit is set up, you can check it from anywhere. No Bluetooth needed:Troubleshooting
To cancel setup at any time, press Ctrl-C.
Alternative: the standalone script
If you would rather not install the CLI, a single script does the same setup through a numbered menu. Install its one dependency withpip install bleak, download the script, run python openhome_client.py, then work through the options in order: scan, connect, scan Wi-Fi, join your network, and set your API key.
openhome_client.py
Download the OpenHome Client script
The CLI is the recommended route. It retries failed steps for you, handles a rejected Wi-Fi password, and supports both DevKit firmware versions.
Need Help?
Ran into an error during setup? Reach out to us on Discord and the OpenHome team will help you out.Discord
See also
- OpenHome CLI: the full command reference, including the DevKit commands
- Abilities: extend your Agent with custom Python-based skills
- Agents: learn how voice Agents work on the OpenHome DevKit
- Local Ability: build Abilities that run directly on the OpenHome DevKit hardware
- OpenHome - Voice AI DevKit App Overview: full overview of the OpenHome - Voice AI DevKit App